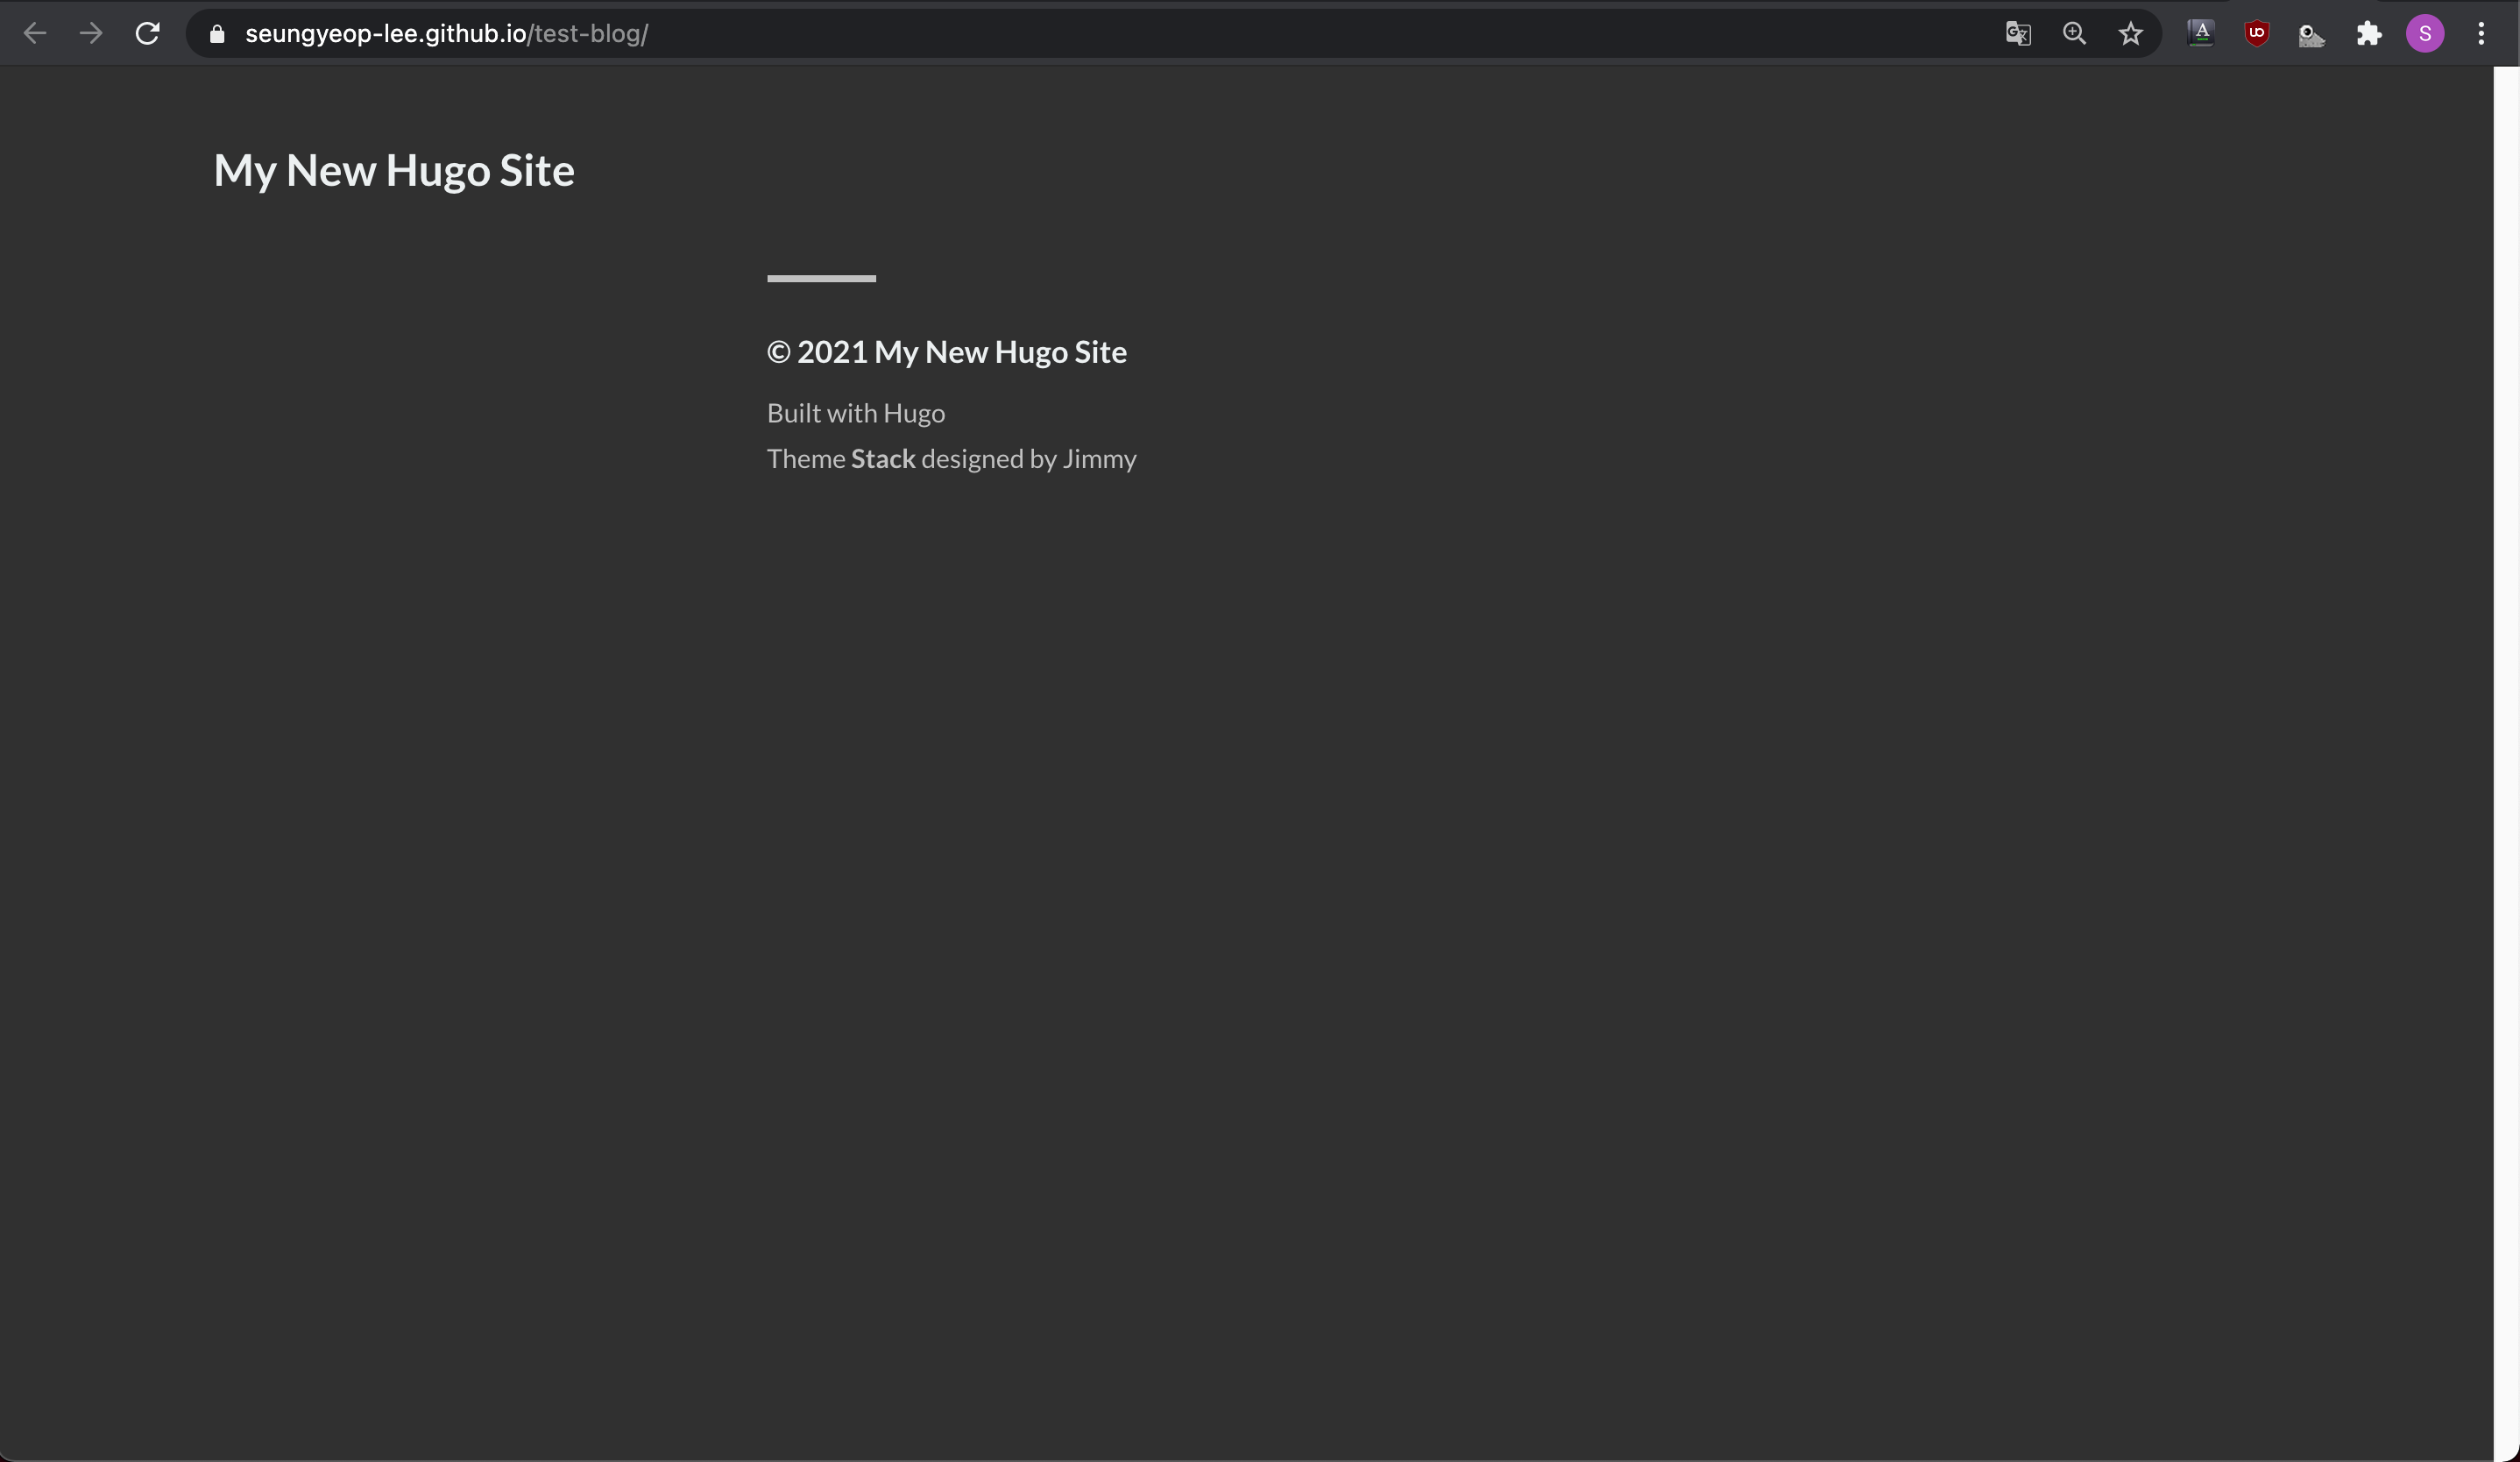
github pages를 이용하여 배포하기
github repository 만들기
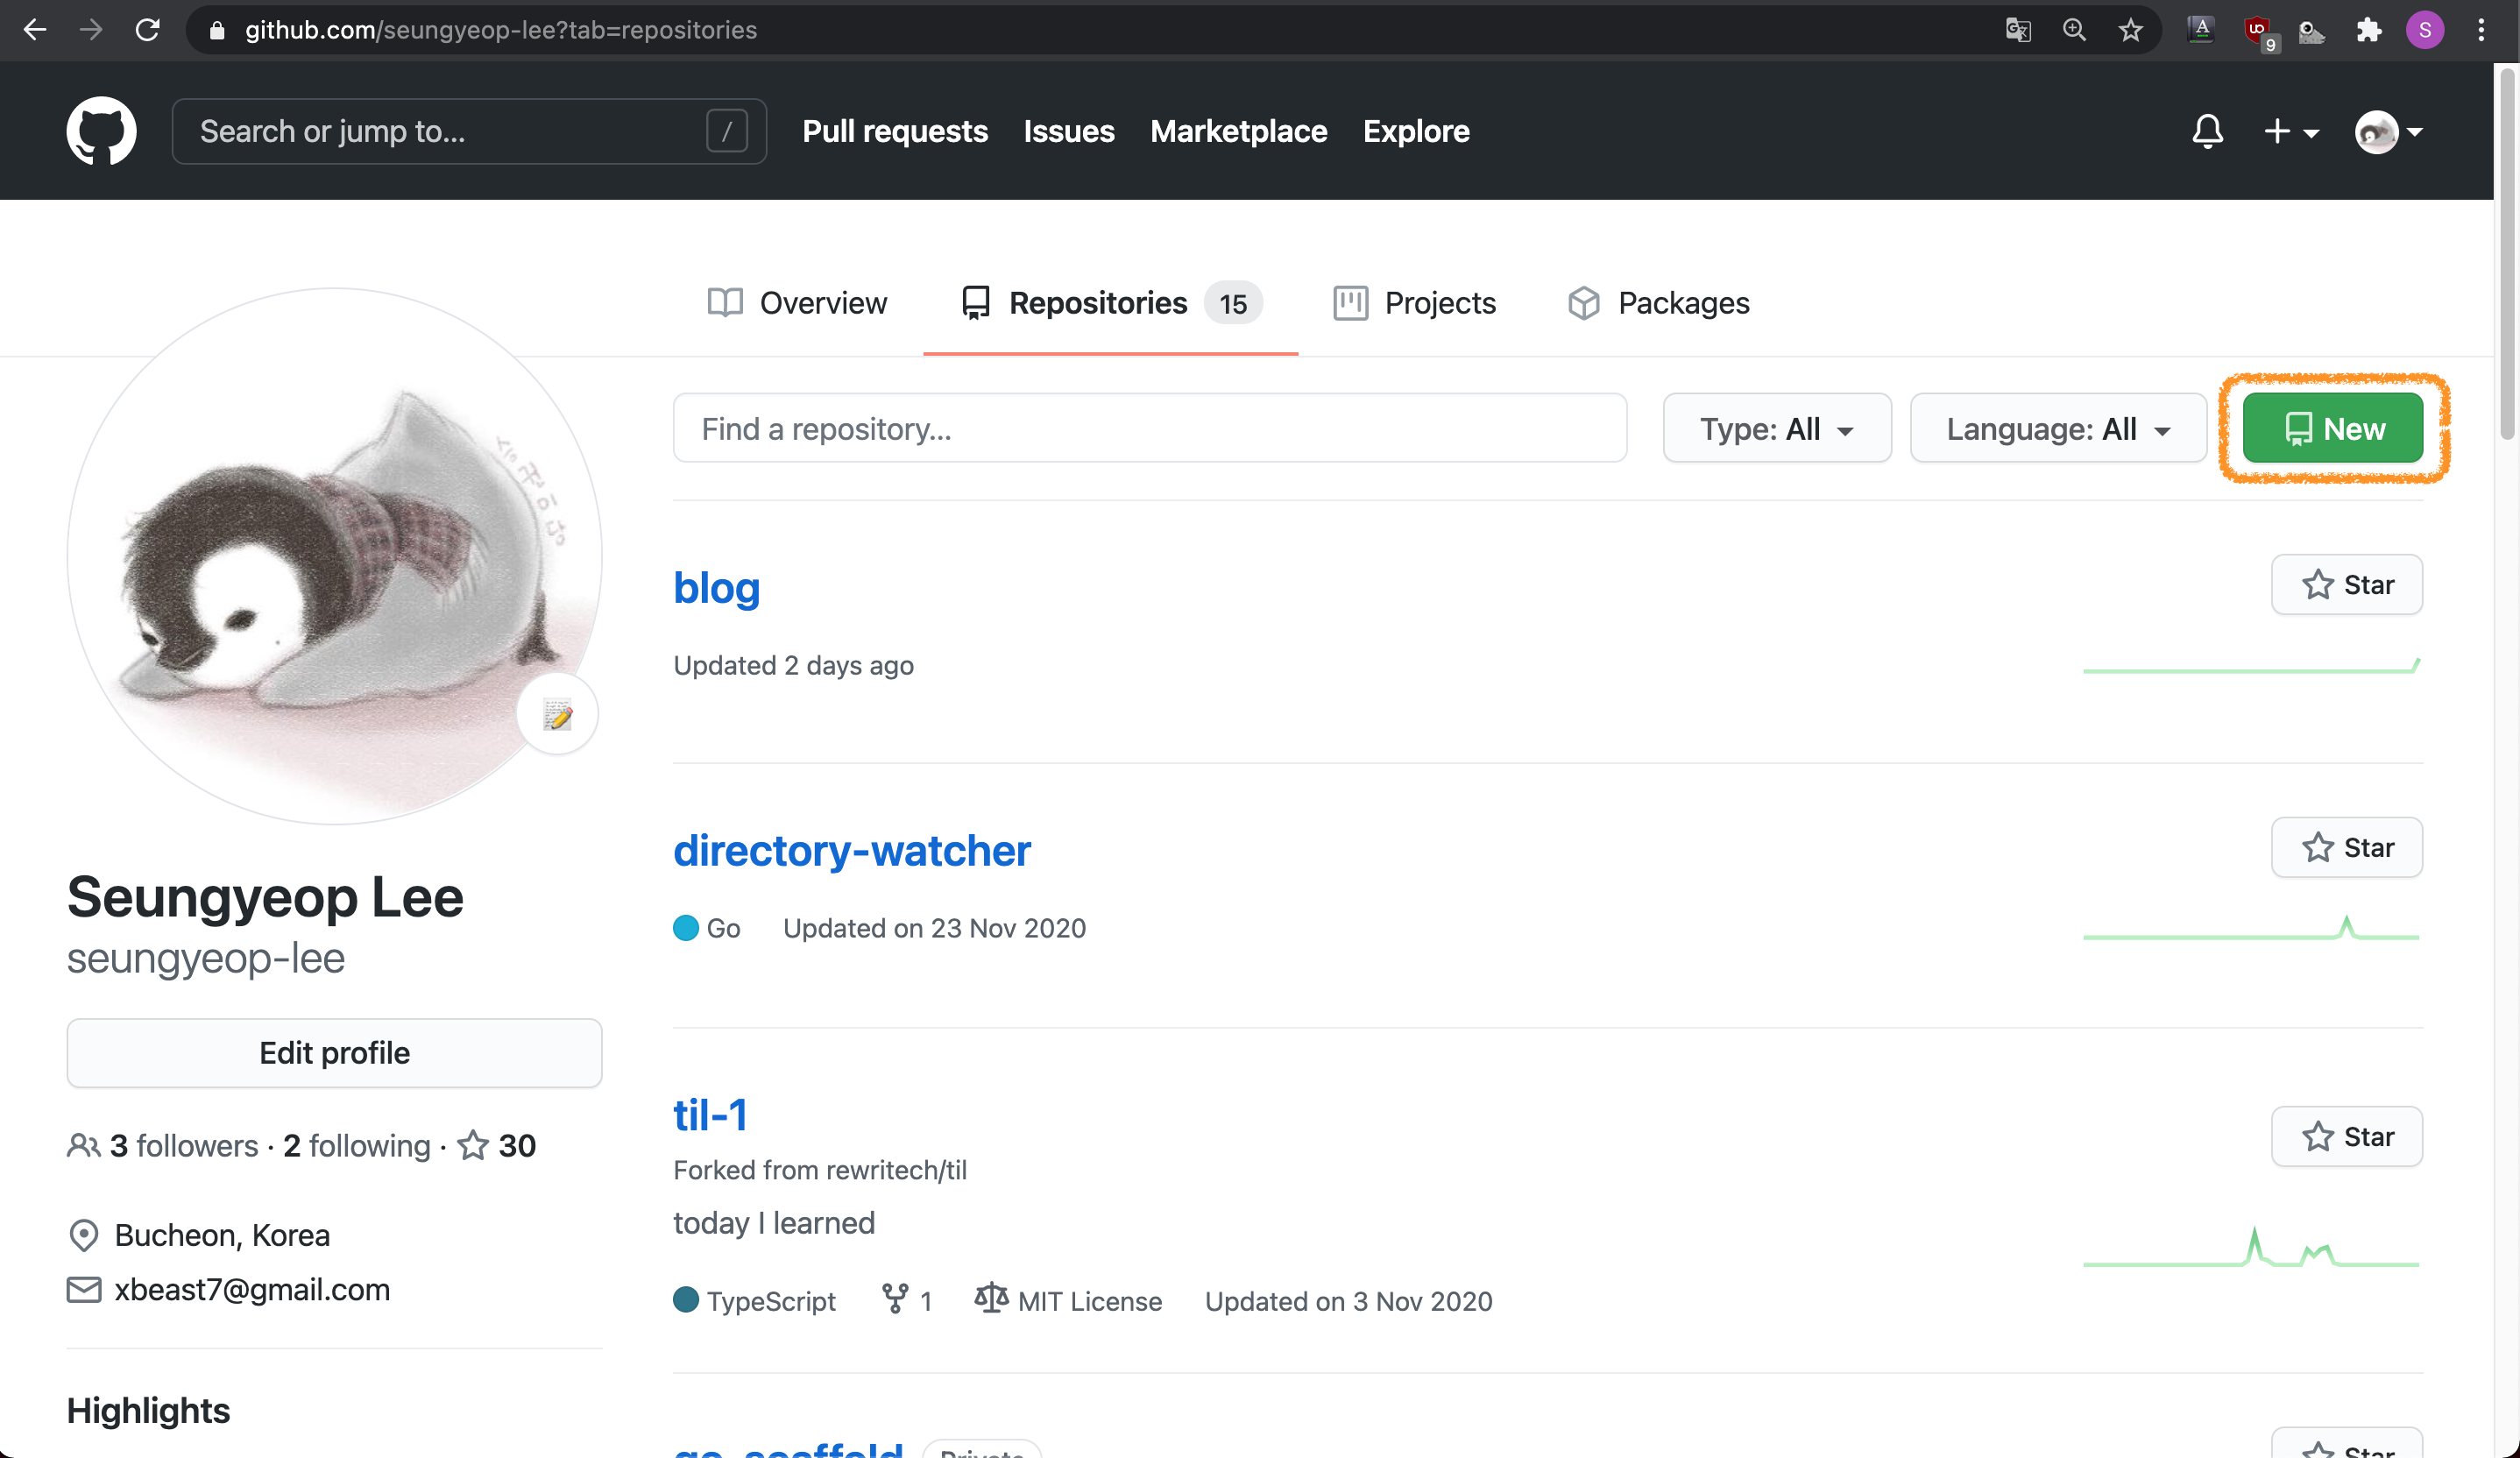
- Repositories 탭에서 New 버튼을 누릅니다.
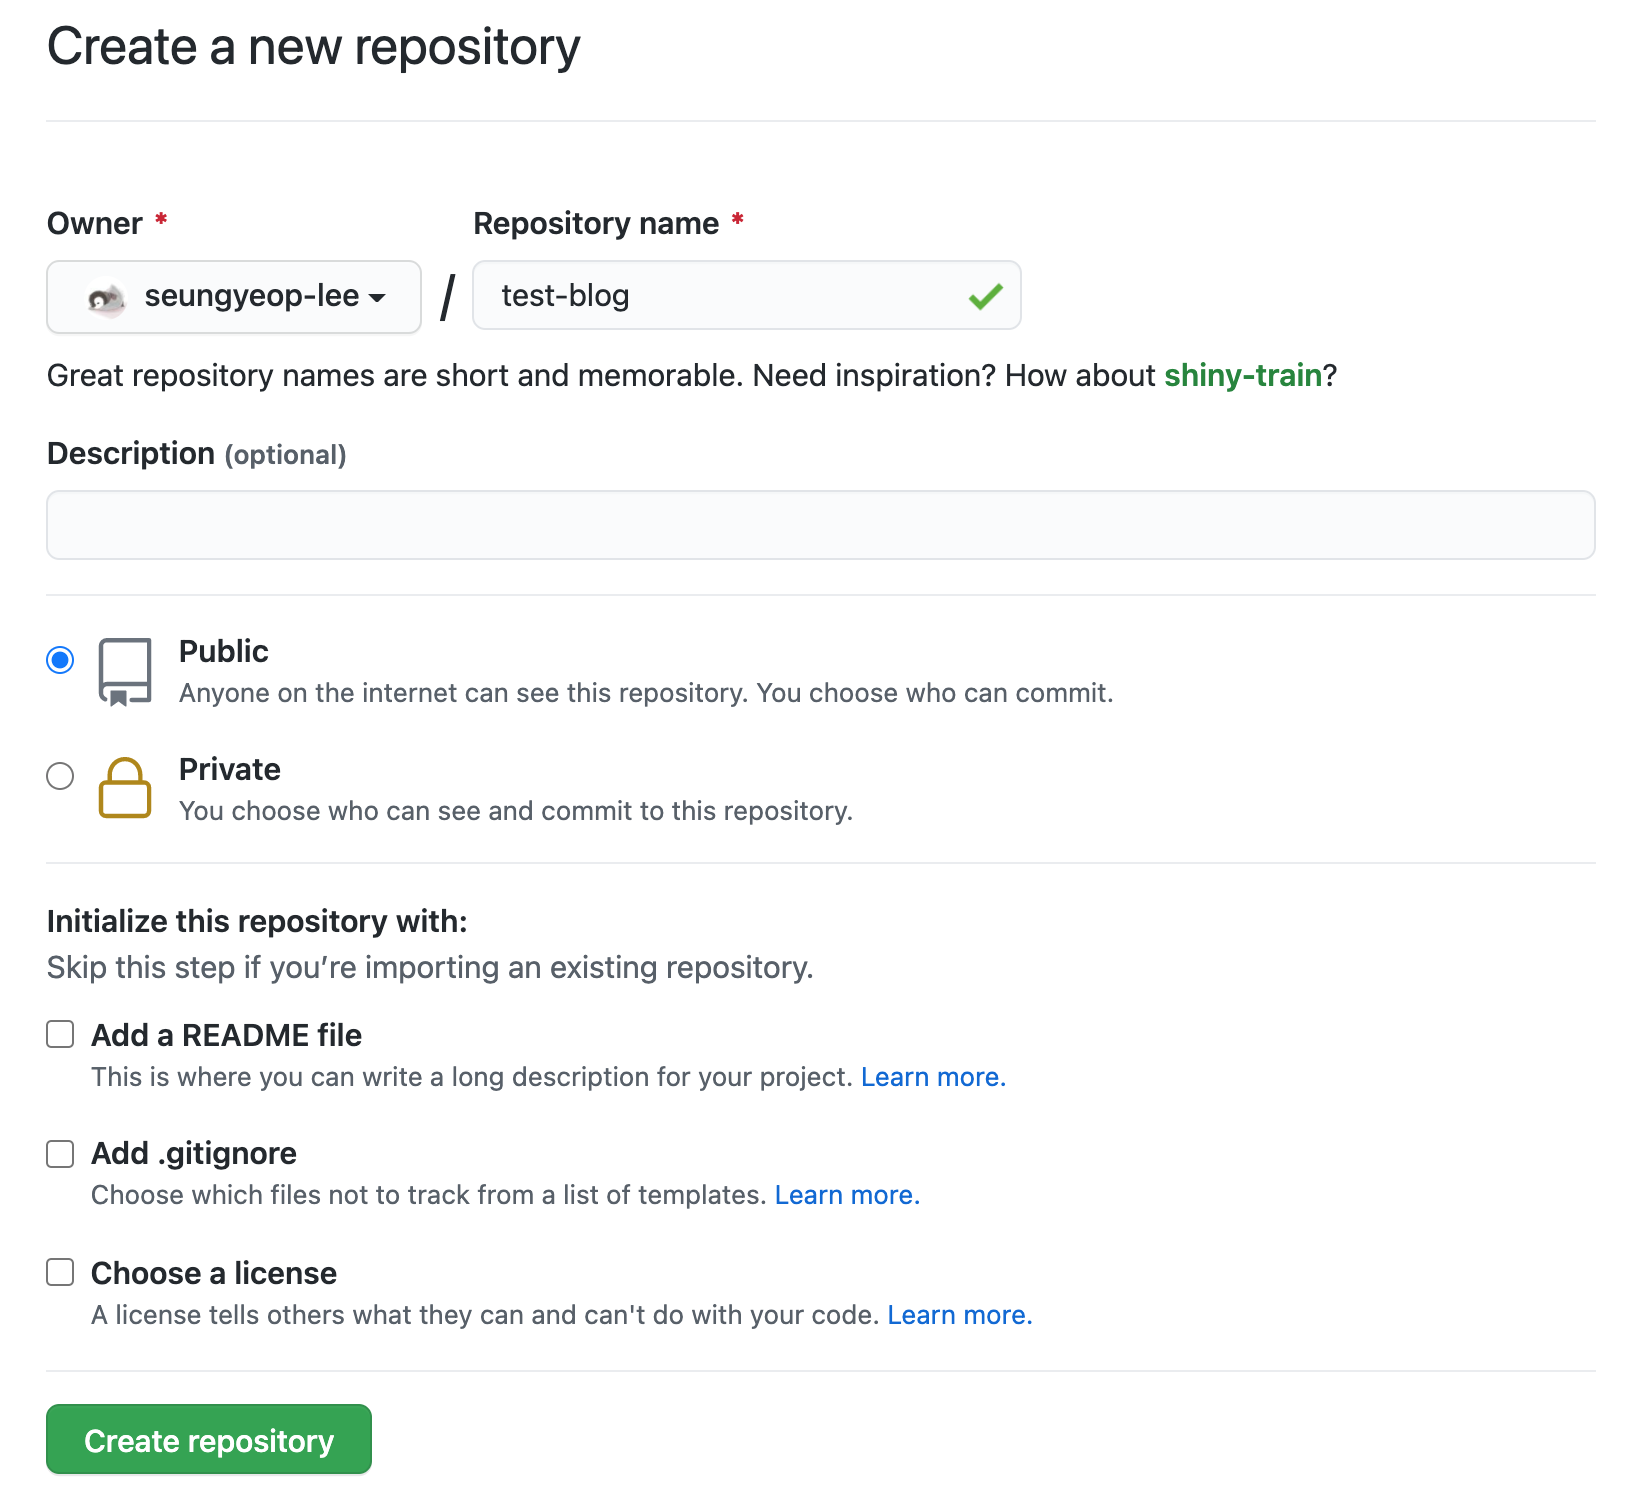
- Repository name을 블로그 이름과 같게하고 Create repository 버튼을 누릅니다.
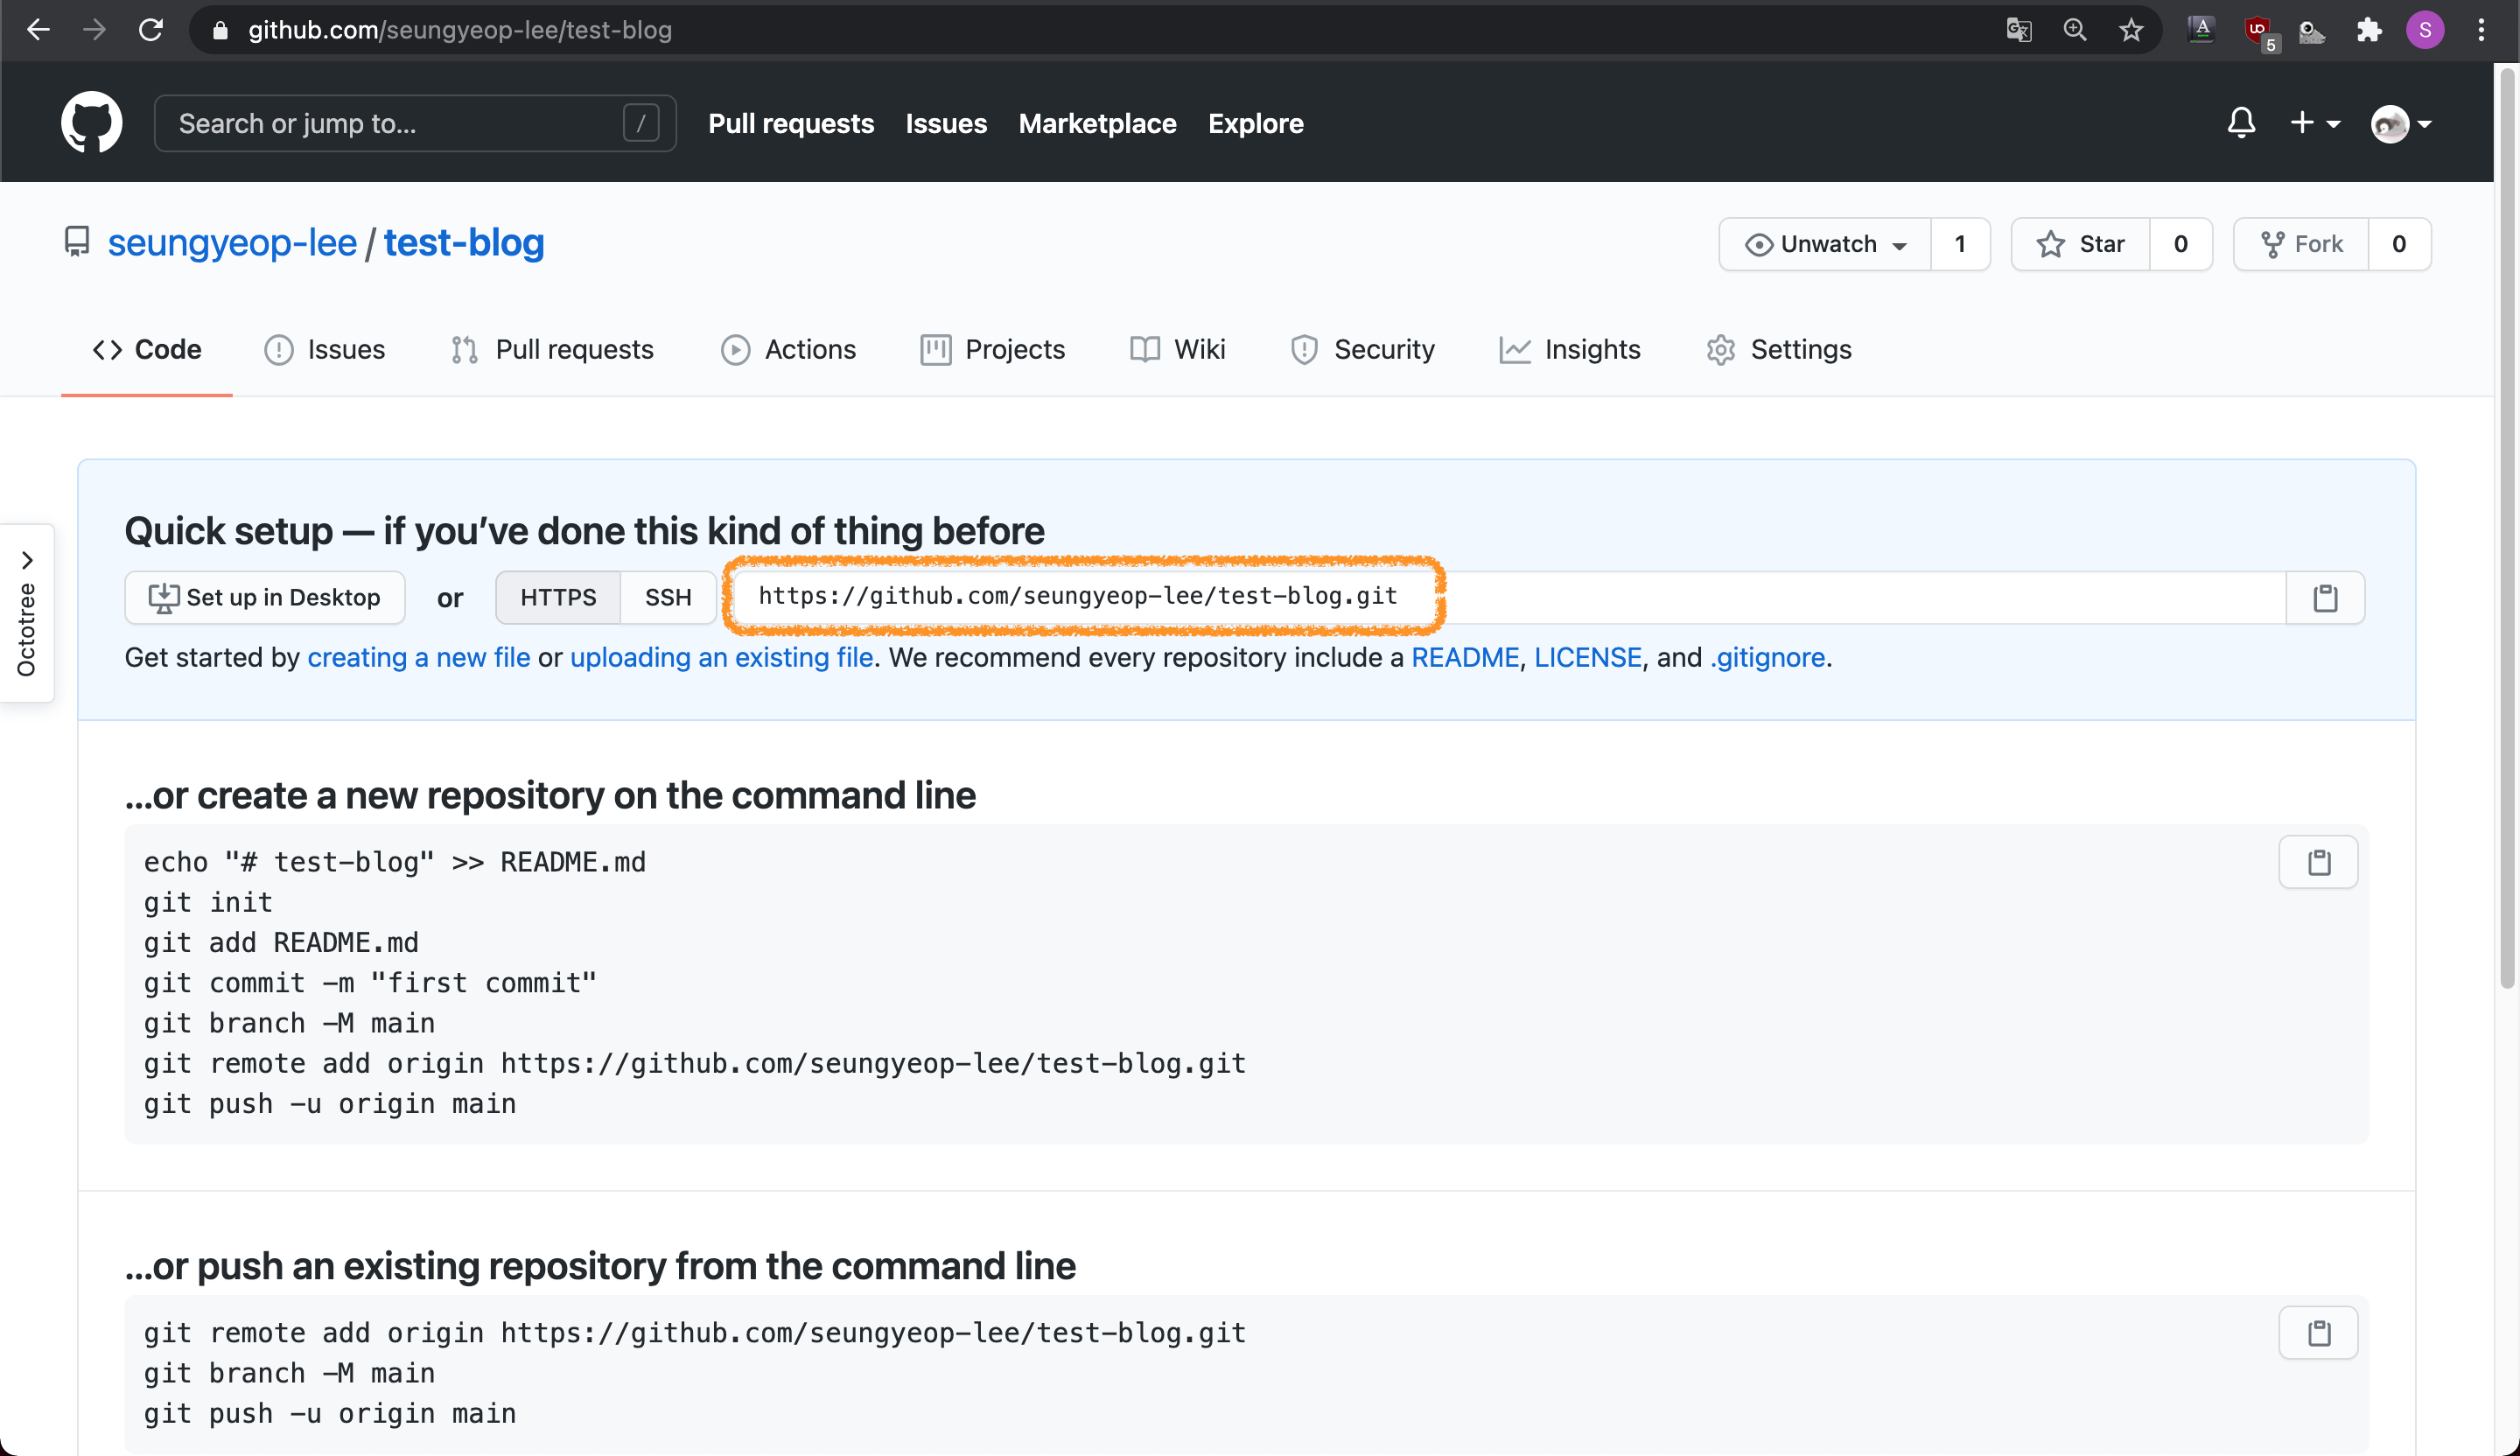
- 로컬에 만들어 놓은 블로그에 지금 만든 repository를 연결합니다.
- 만든 repository의 https에 쓰여있는 주소를 이용합니다.
$ cd test-blog
$ git remote add origin https://github.com/seungyeop-lee/test-blog.git
자동배포 설정하기
GitHub Pages action과 Hugo setup를 이용한다.
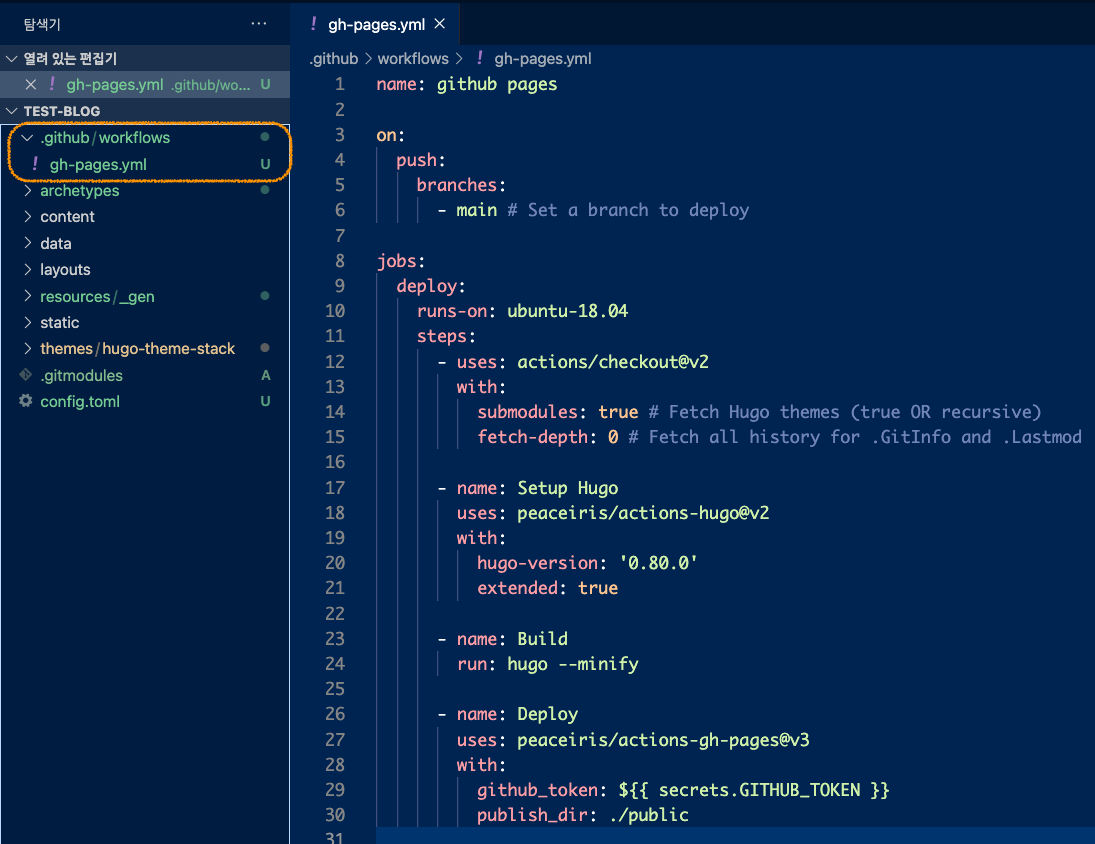
- 로컬에 만들어 놓은 블로그 폴더에 github actions 파일을 만듭니다.
- ex.
.github/workflows/gh-pages.yml
- ex.
- github actions 파일에 아래의 코드를 추가합니다.
name: github pages

on:
  push:
    branches:
      - main # Set a branch to deploy

jobs:
  deploy:
    runs-on: ubuntu-18.04
    steps:
      - uses: actions/checkout@v2
        with:
          submodules: true # Fetch Hugo themes (true OR recursive)
          fetch-depth: 0 # Fetch all history for .GitInfo and .Lastmod

      - name: Setup Hugo
        uses: peaceiris/actions-hugo@v2
        with:
          hugo-version: '0.80.0'
          extended: true

      - name: Build
        run: hugo --minify

      - name: Deploy
        uses: peaceiris/actions-gh-pages@v3
        with:
          github_token: ${{ secrets.GITHUB_TOKEN }}
          publish_dir: ./public
github pages 배포하기
- 만들어놓은 github repository에 push합니다.
$ cd test-blog
$ git add --all
$ git commit -m "first commit"
$ git branch -M main
$ git push -u origin main
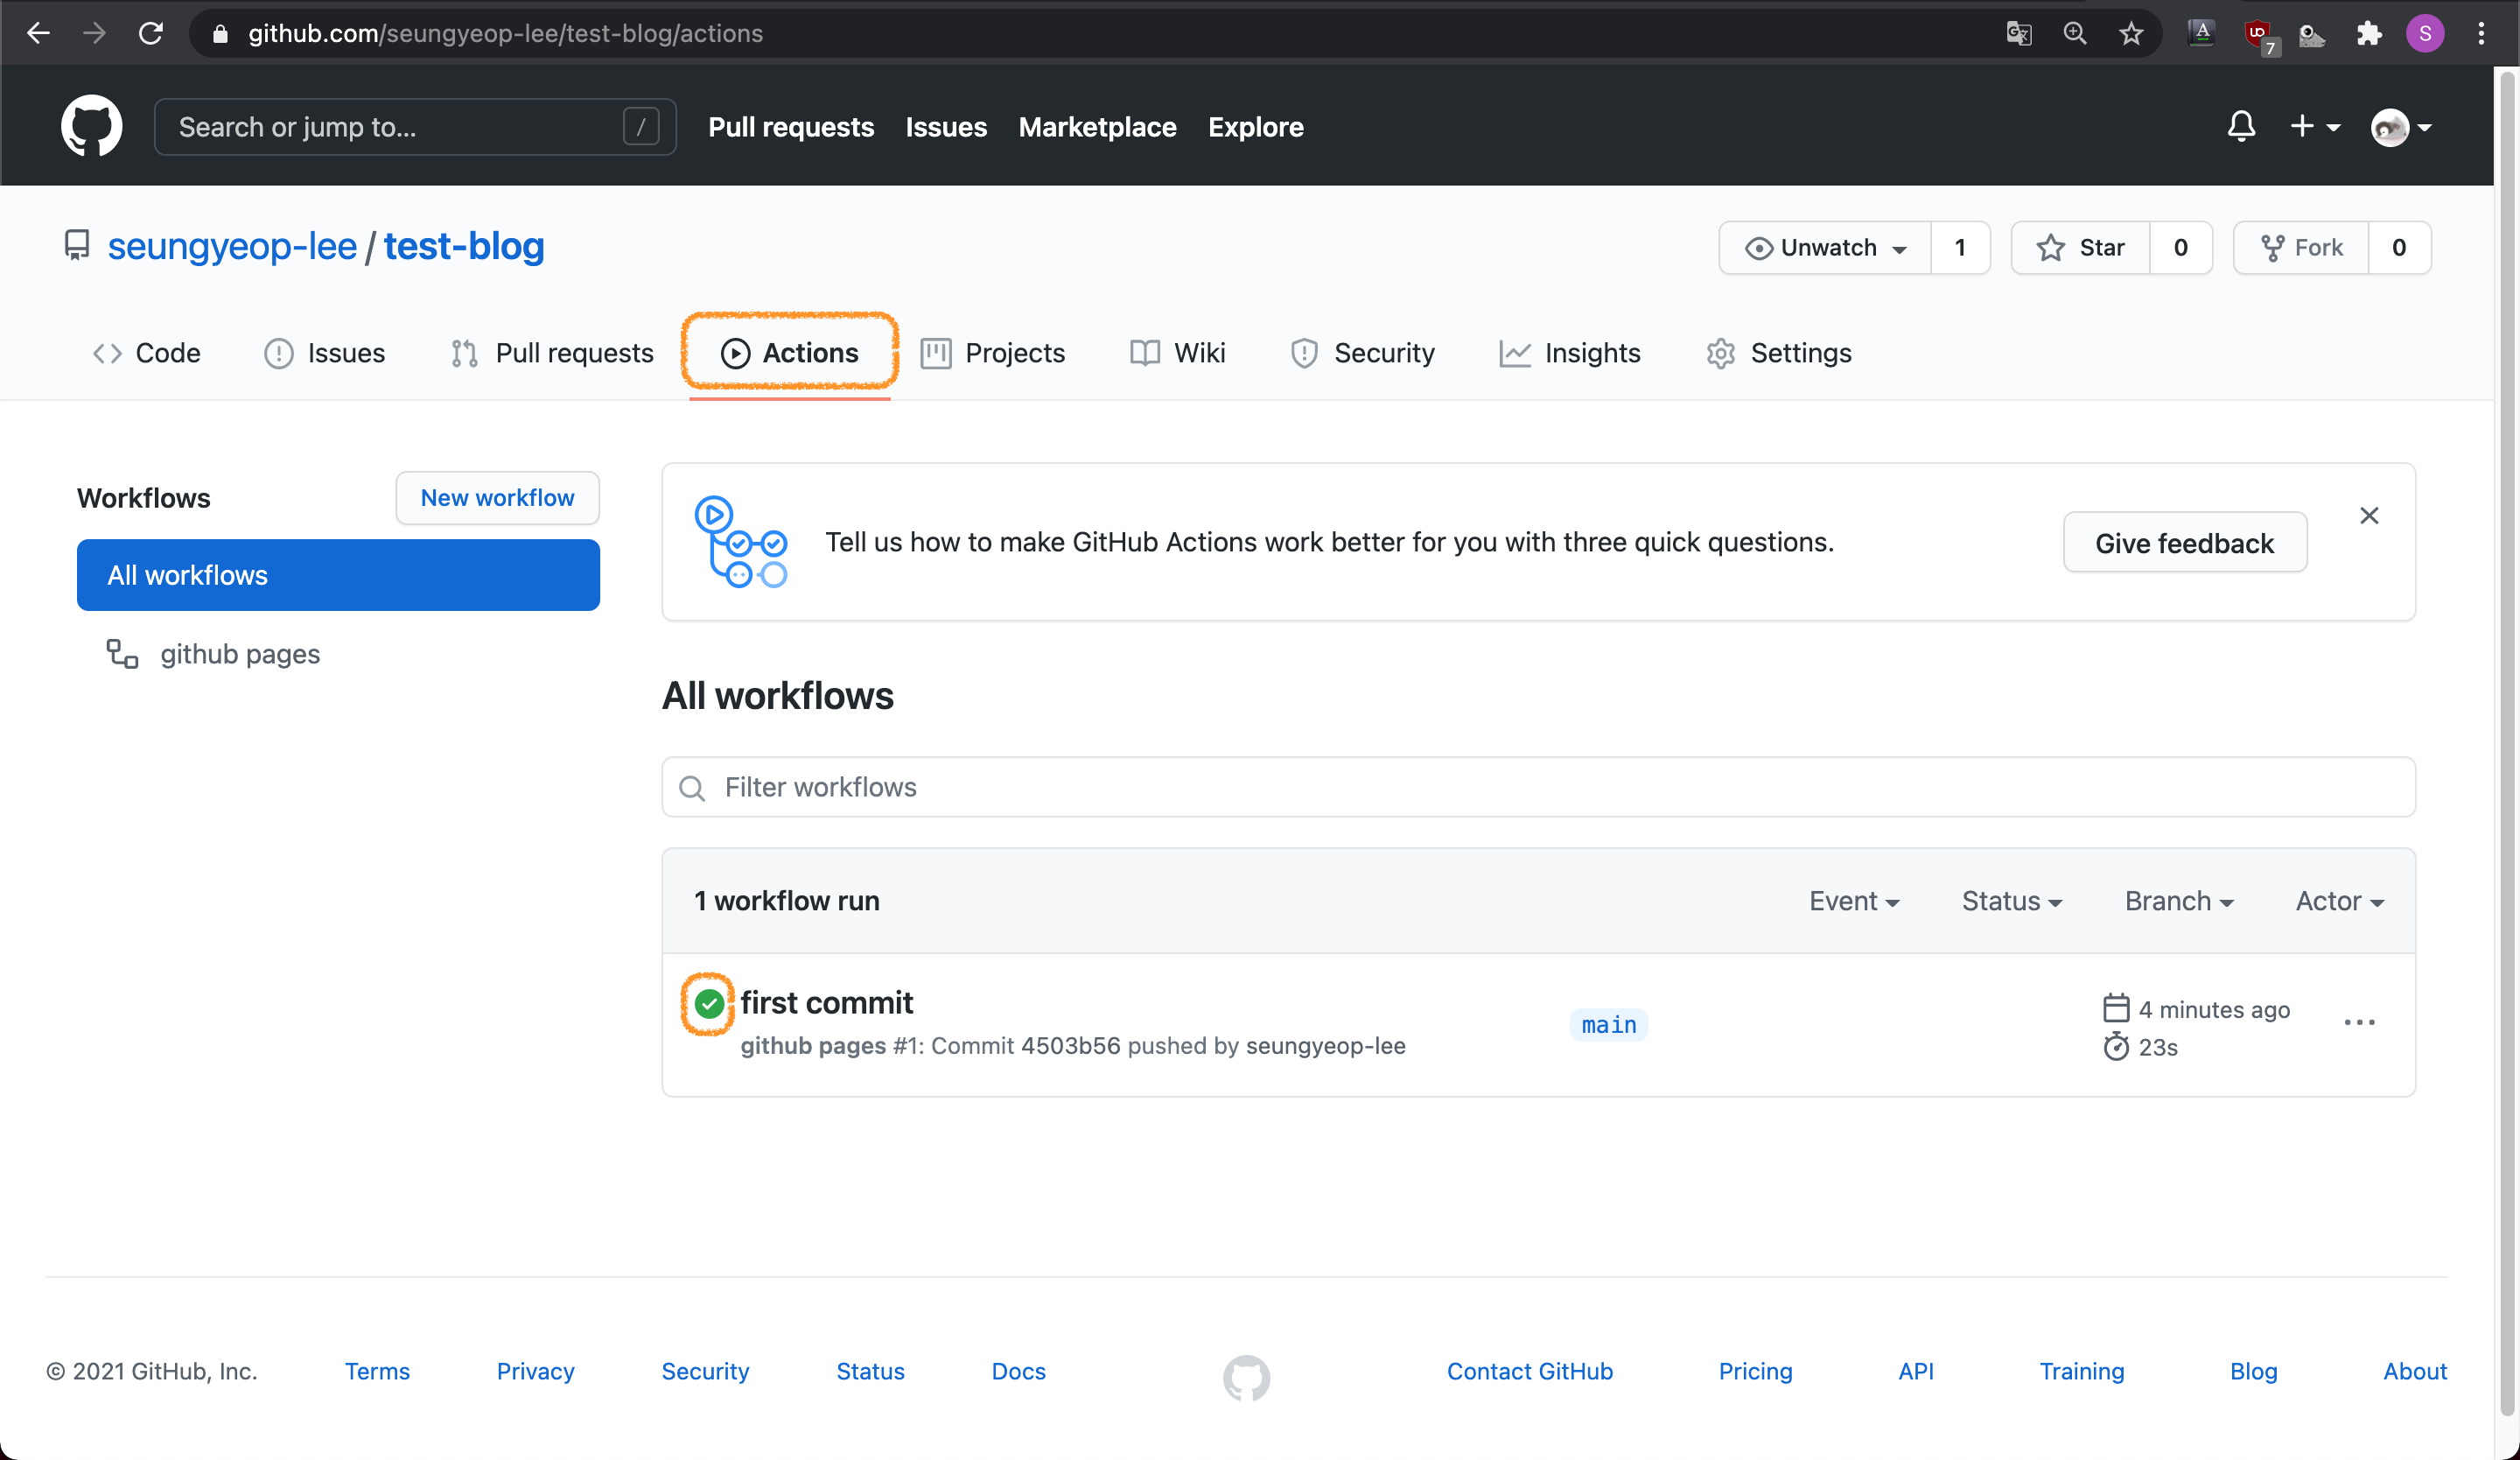
- github repository의 Actions 탭으로 이동하여 자동 배포가 완료되었는지 확인합니다.
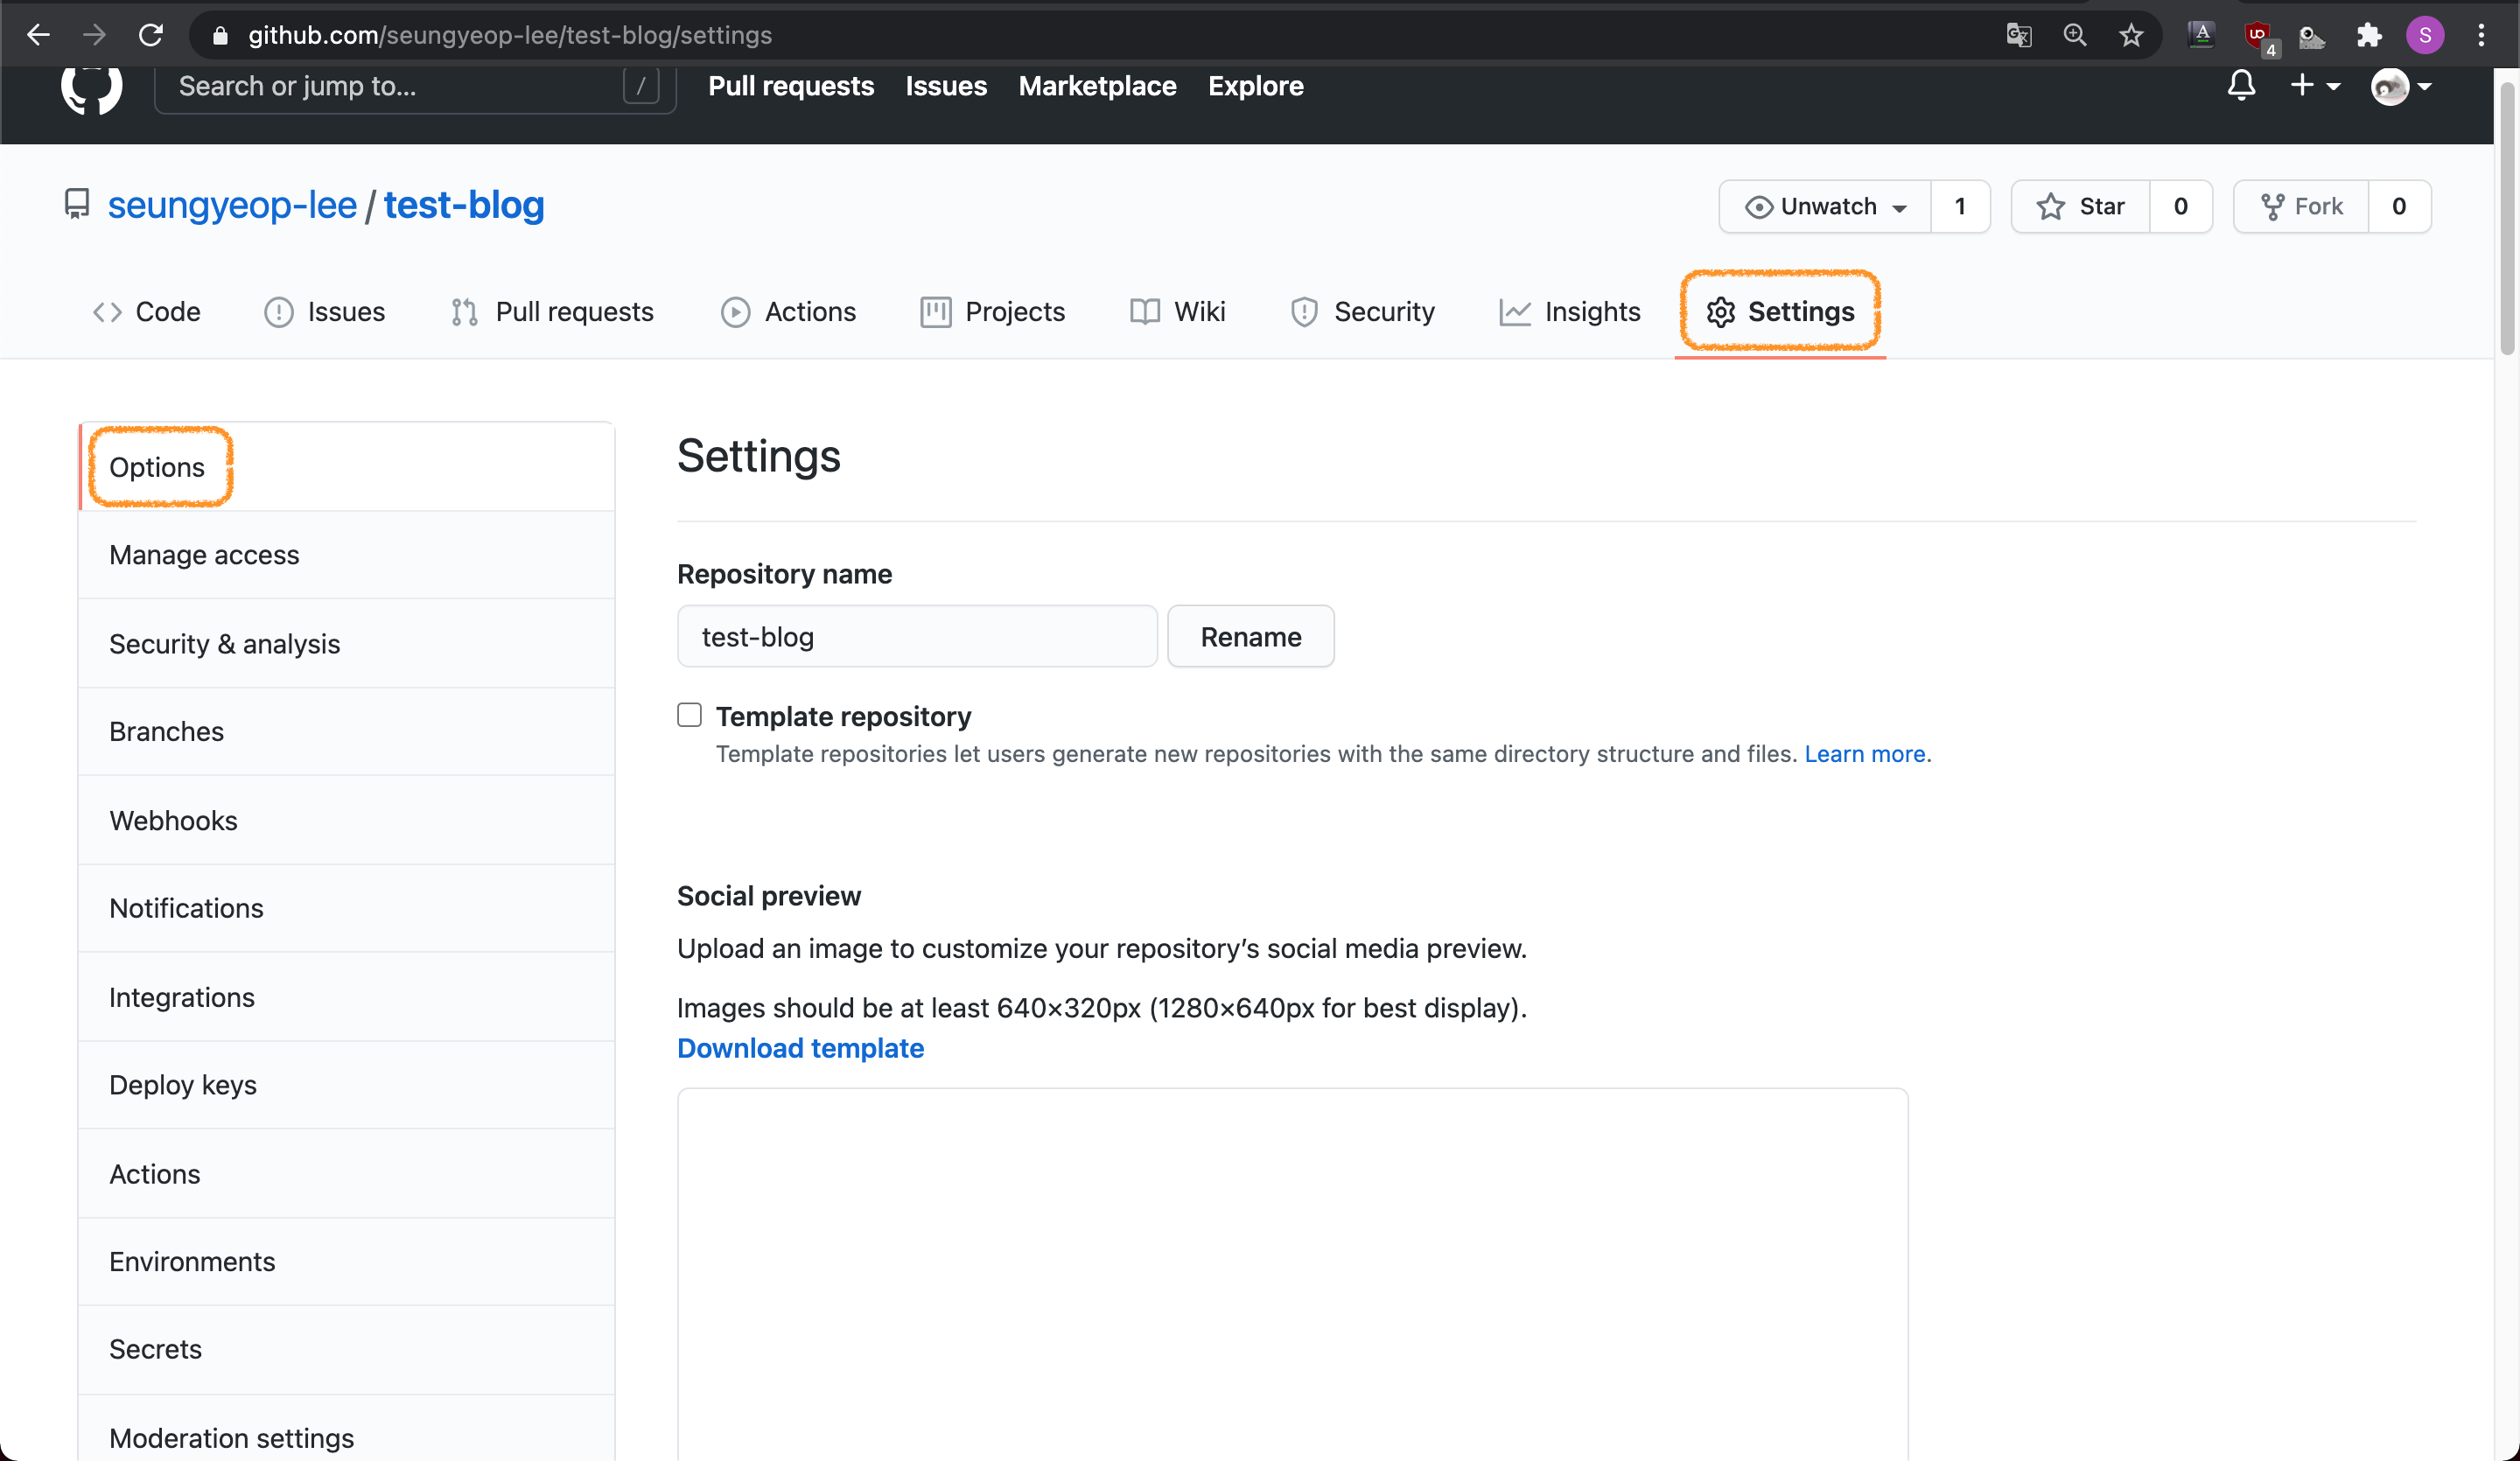
- Settings 탭의 Options로 이동합니다.
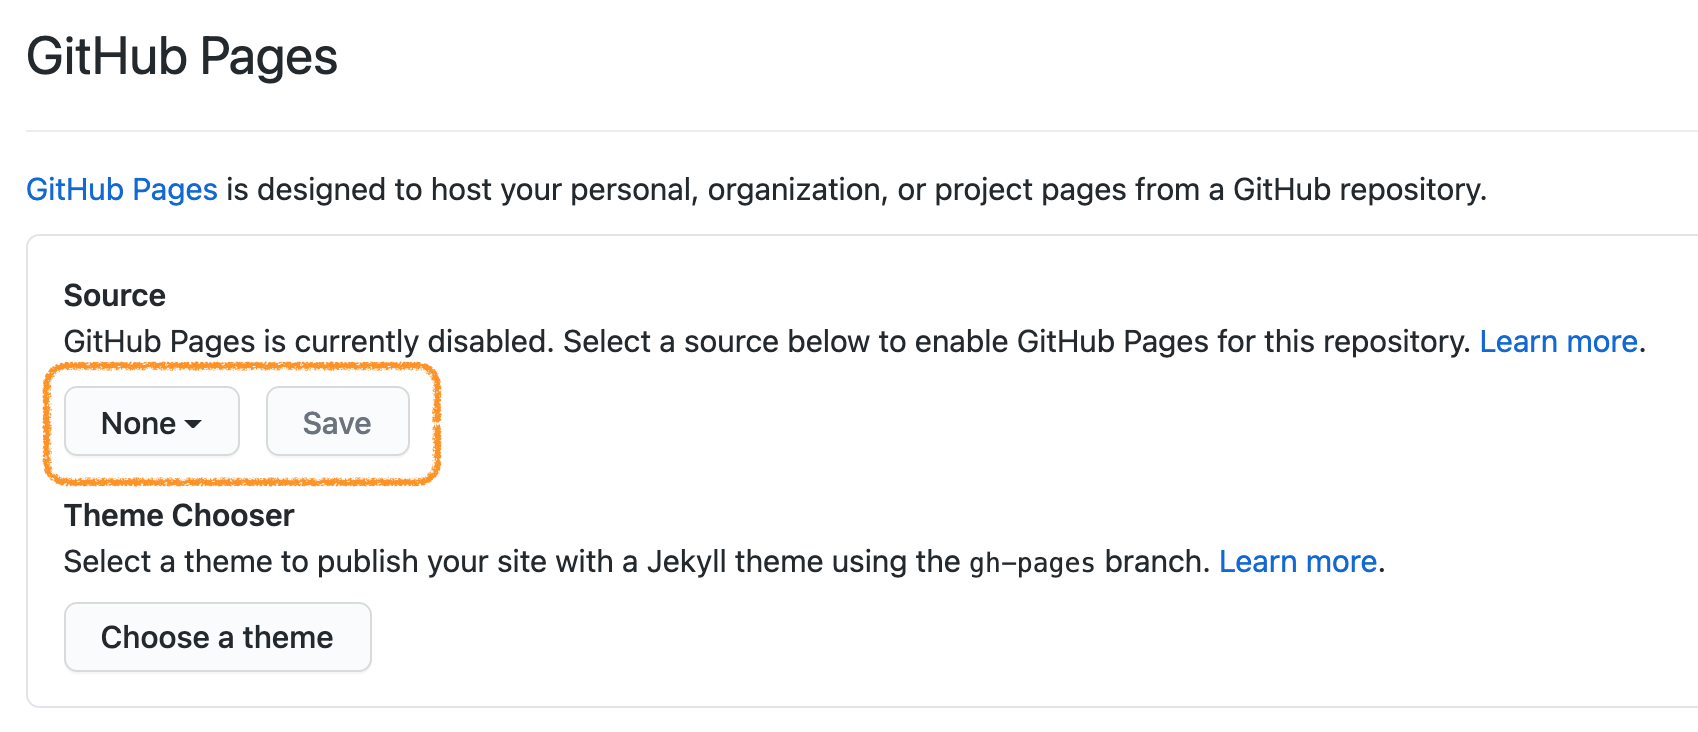
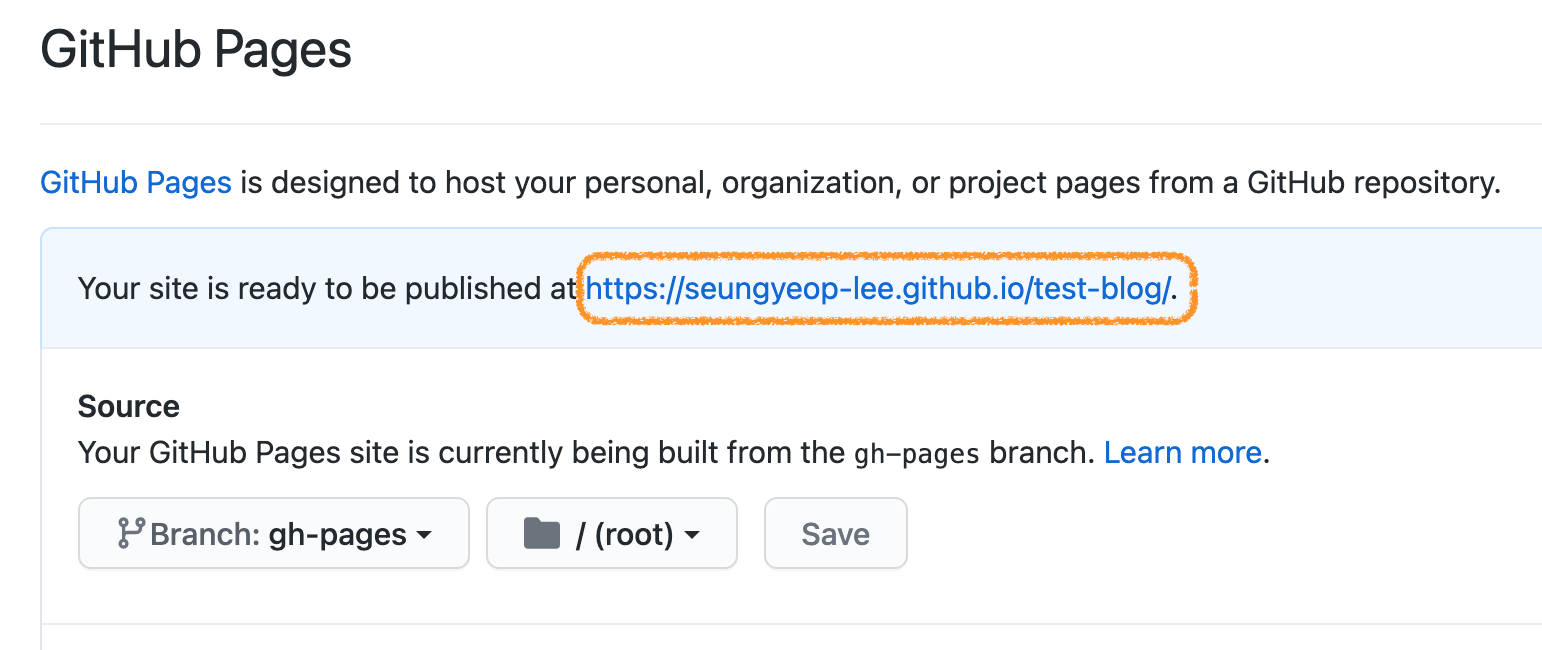
- GitHub Pages > Source에 아래와 같이 설정 후 Save 버튼을 누릅니다.
- Branch: gh-pages
- / (root)

- GitHub Pages로 다시 가보면 github pages의 주소가 보입니다.
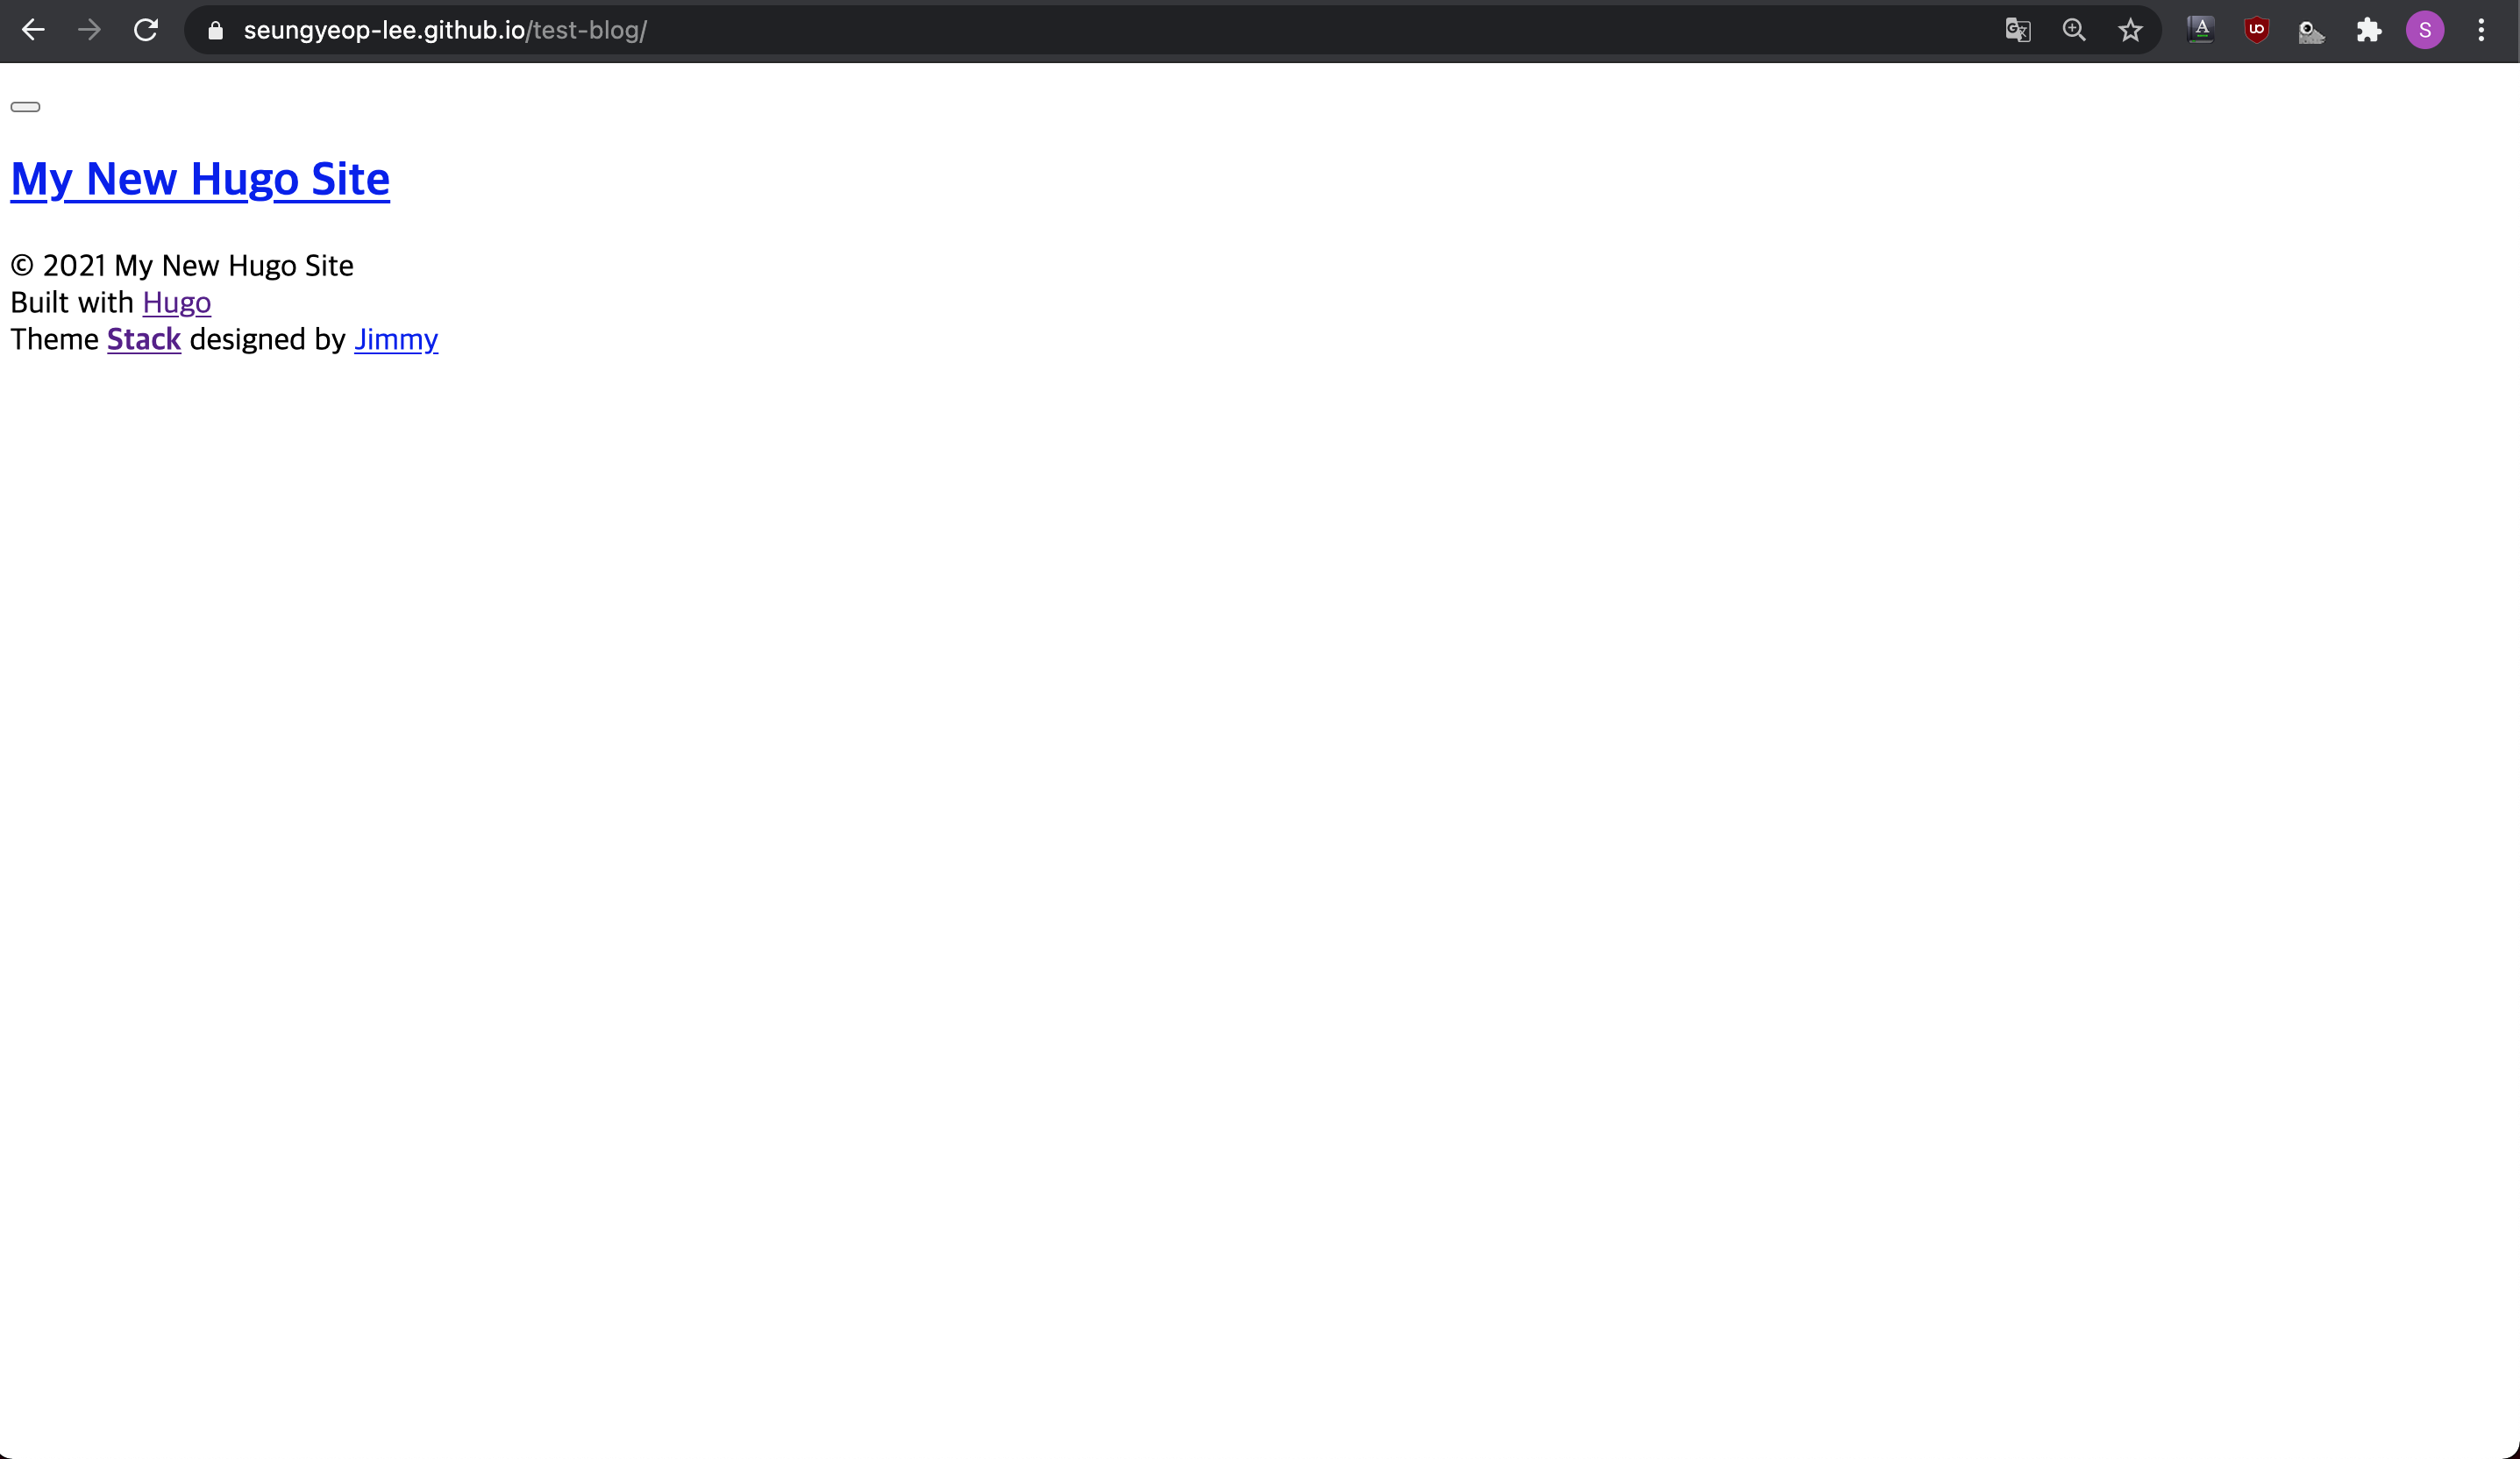
- 접속해보면 배포된 블로그가 보입니다.
baseURL 수정하기
baseURL 수정이 되지 않아 css 및 js 파일이 제대로 적용되지 않은 문제를 해결합니다.
- 블로그 폴더의
config.toml파일의baseURL을 생성된 github pages 주소로 변경합니다.
baseURL = "https://seungyeop-lee.github.io/test-blog/"
- github repository에 push하여 반영합니다.
$ cd test-blog
$ git add --all
$ git commit -m "change baseURL"
$ git push
github repository의 Actions 탭에서 자동 배포가 완료되었는지 확인합니다.
배포된 블로그로 이동하여 확인합니다.